Feb 5, 2026
Let’s compile Quake like it’s 1997!
The first batches of Quake executables, quake.exe and vquake.exe were programmed on HP 712-60 running NeXT and cross-compiled with DJGPP running on a DEC Alpha server 2100A. In June of 1996, having shipped their title but concerned with NeXT stagnation, id Software switched their development stack.
We moved to Intergraph hardware running Windows NT right after shipping Quake.
The next versions of Quake, glquake.exe, vquake.exe, and QuakeWorld (qwcl.exe and qwsv.exe) were all developed and compiled on Windows NT with Visual C++ 4.X.
This article describes the steps to re-create the experience of building the win32 binaries of Quake as it happened in 1997.
The purist’s corner
Depending on the level of historical accuracy you want to reach, you can follow the steps with four environments.
- Find an Intergraph RealizM Dual P6-200MHz workstation (good luck).
- Find a dual Pentium Pro machine (good luck again but finding a W6-LI is doable).
- Use a regular late 90’s PC like the Quake PC.
- Download Oracle’s Virtualbox and create a VM.
I tested these steps both on the Quake PC and in Virtualbox, running either Windows 98SE or Windows NT 4.0.
Installing Windows NT 4
Installing Windows NT 4 is pretty easy since the CD is bootable. Installation took 30 minutes.

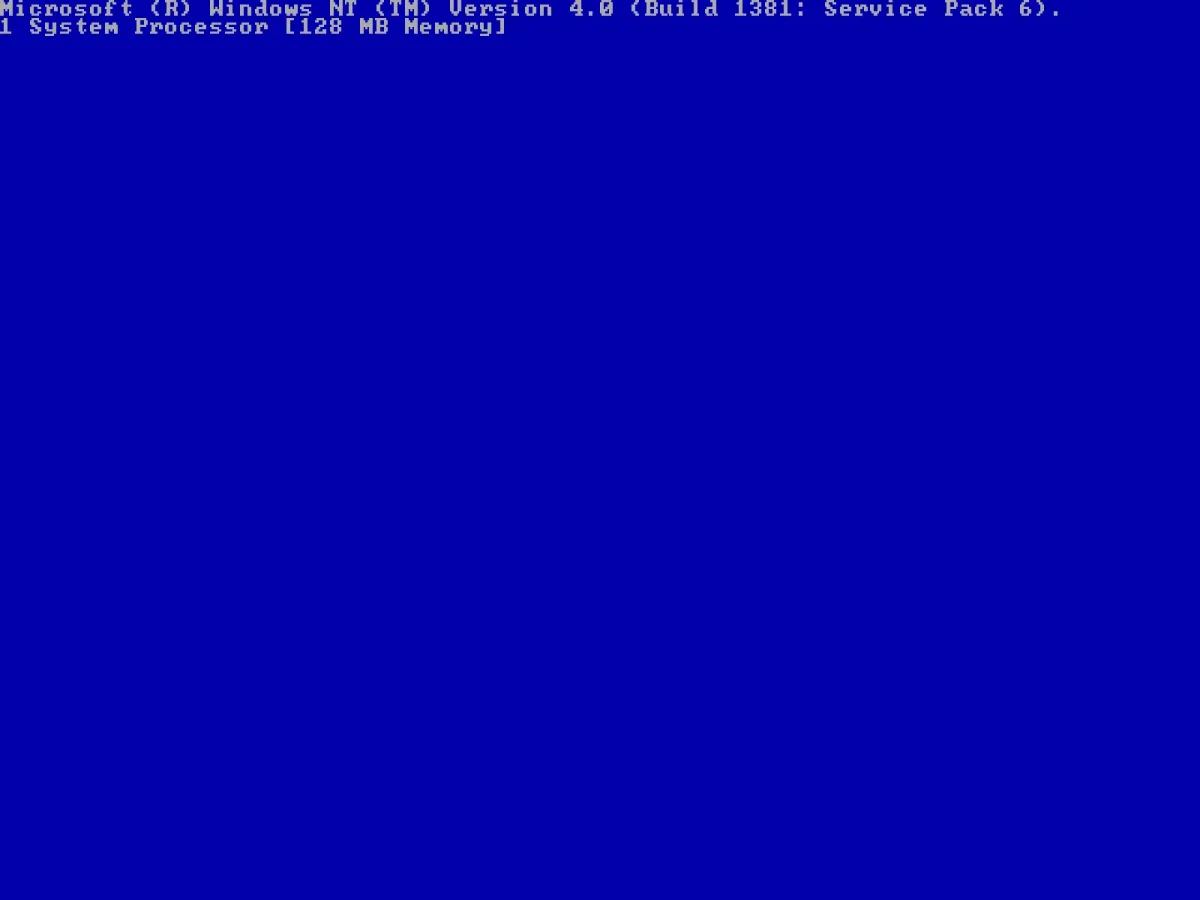
I love how minimalist Windows NT startup screen is. It proudly displayed how many CPUs are detected (Windows 95/98 only supports one CPU) and how much RAM is there. There is no silly animation.
Adding a second CPU to a system won’t be automatically detected by Windows NT. You need to re-install to get the HAL handling SMP systems. The same thing goes with dual CPU motherboard. On a W6-LI, one need not only to add another Pentium Pro but also a regulator!

Windows NT 4 uses the same UI theme as Windows 9X. The first release, Windows NT 3 used the same UI elements as Windows 3.1. It looked awful.
Installing Visual C++ 6
The Win32 version of Quake were coded on Visual C++ 4.X since it was the most recent version of Microsoft IDE available in mid-96. However, by 1999, the project had been migrated to Visual C++ 6. If you don’t have the CD handily available, you can likely find it on the Internet Archive or winworldpc.com.

In a time before “always on” Internet, most software had a product ID to fight piracy.

The installation screen also brings up the next “Visual Studio”, combining many development environments. It would soon become the one Microsoft IDE over the years.

The installation screen looks off. There is a lot of empty space and the progress bar is awkwardly placed. That is because Microsoft did not expect this to run at the crazy high resolution of 1280×1024 (which id developers likely used on their 21″ monitors). It looks as intended in 640×480 or 800×600.


With VS++6 installed, we now need to get the source code. DO NOT get it from github or transfer the files via FTP. This will mess up the workspace .dsw file. Then VC++6 will be unable to parse it. And it won’t even give you an error message, it will just open and show no file / project associated. You will lose 1/2 a day trying to debug it until you find this page.
Instead, you need to find q1source.zip. It used to be available on id Software’s FTP server but now you can get it from the awesome Quake Official Archive maintained by Jason Brownless[2].

With a VM you can transfer file via drag/drop. Alternatively you can use Quick ‘n Easy FTP Server which works on both 9X/NT.

To decompress q1source.zip, you will need WinRar. Version 2.50 still works well on 9X/NT.

Now launch VC++6. Select “Open Workspace” then pick “WinQuake.dsw”.
Modern versions of Visual Studio use .sln (Solution) and .vcxproj but Visual C++ 6 uses .dsp and .dsw. The dsp contains a single project while the dsw is a workspace pointing to dsp projects.

Start the build with “Rebuild All”

The build will fail because VC6++ was unable to assemble all the .S files which contain the hand-optimized assembly by Michael Abrash.

The assembler comes with VC++6 Processor Pack (vcpp5.exe).

Of course, launching setupsp5.exe to install it will fail. This is because you need to install MDAC 2.5 first.

Don’t lose an hour trying to download MDAC from somewhere. You just need to run acmsetup.exe which is in the same folder created when vs6spp5.exe decompressed itself.

Now go back and run setupsp5.exe. This time it will work. By now it should feel like you are following the solution of Monkey Island. Nothing makes sense. We are definitely deeeep into the 90s.

More awkwardly small progress bar but this is still progress.

Re-open the project with VC++6 and run “Rebuild All ” again. This time it should work.

Yup! Enjoy! You can even run QuakeWorld and it works with QSpy!

A darn good IDE
VC++6 is remarkably powerful for 1996. It already has features such as “Go to definition”, breakpoints, stacktrace, and variable inspections. I never used it but it must have felt like a dream at the time.


References